Section 2.6 - Creating a new project
Now that we have explored the basic workings of fsTimer with the fstimer_demo project, we will briefly cover making a new project. This will generally be the first step to preparing to time a race.

First you will choose a name for the project. As it says, only letters, numbers, and underscore may be used in the project name. This will create a subdirectory in the fsTimer directory using the project name. That is, if the project name is project_name, it will create the directory fsTimer/project_name. All of the files generated by fsTimer will be saved in that project directory.
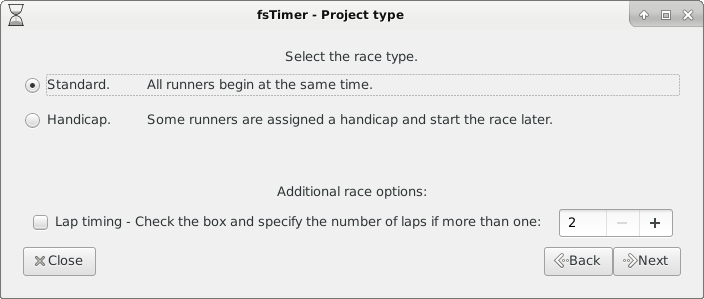
Next the project type is specified. As it says on the window, there are two project types: standard and handicap. A standard race is one where all racers have the same start time. In a handicap race each racer specifies a handicap, which is an amount of time that they will start later than the start time. Thus different racers can have different start times, but fsTimer will automatically subtract out their handicap when computing finishing times. For either race type, it is possible to have a race with multiple timed laps.
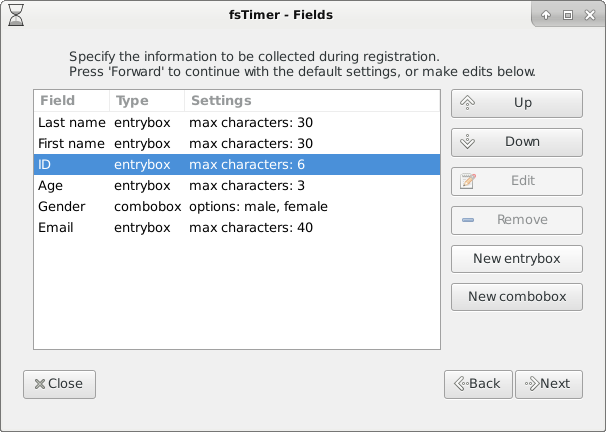
The next thing to be specified are the registration fields. These are exactly the fields that will show up in the "Registration" window. ID is a required field and must be filled out for runners to show up in results, but otherwise the fields can be customized to those which you want to use. New fields can be added as either an entrybox, meaning a box into which any information can be typed (like for name), or a combobox where one of a few options must be selected (like for gender).

When you press the "Printouts" button from the Timing window, fsTimer will automatically generate two nicely formatted sets of results: overall results listing everyone, and automatically generated divisional results. This is the window where you can specify what the divisions should be for generating the divisional results. You specify the division name, and what the parameters for the division should be. The parameters can be a range of ages, and/or a collection of combobox values.
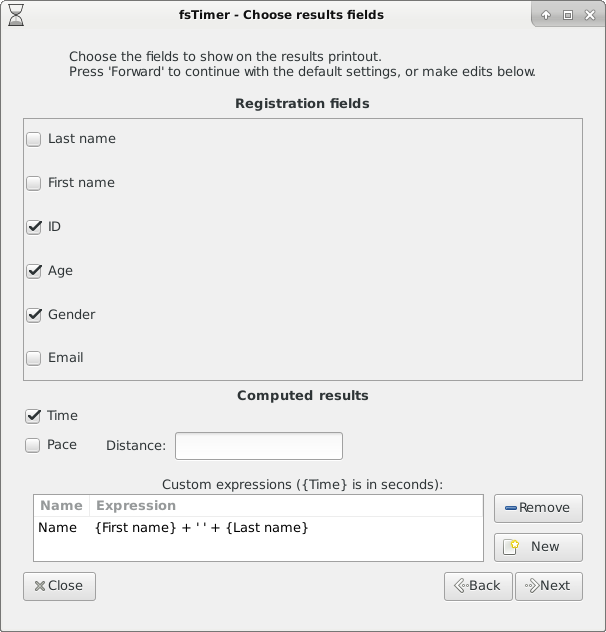
In the next window you can specify which fields to include in the results printouts. You can include or not include any of the registration fields defined earlier, Time, Pace (calculated using the specified distance), or any custom expression. Section 4.1 explains how custom expressions can be used.
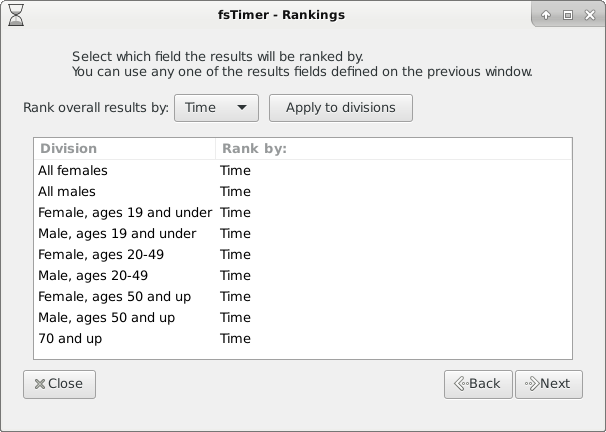
Finally, you can choose how the results in the printouts should be ranked, for both overall results and for divisional results. Typically this will be Time, but you can make it whatever you want it to be (including any custom expression defined on the previous window).
And that's all there is to starting a new fsTimer project!
Continue on to Section 3 Checklist for timing with fsTimer.