Section 2.1 - Opening and main windows
When you start fsTimer, the first window will be the opening window:
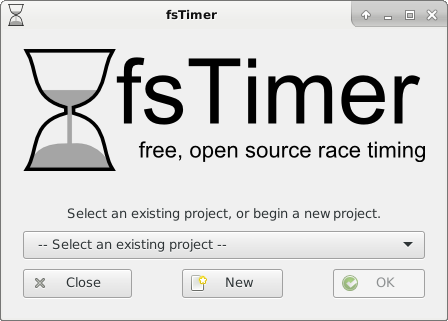
Each race that you time will be a "project" in fsTimer. When you create a new project, this will automatically create a corresponding subdirectory in the fsTimer directory. In Section 2.6 we cover how to start a new project, but first we will overview the software using the "fstimer_demo" project that is included with the software. So, use the drop-down menu to select "fstimer_demo" and press "OK."
This will load the main window:
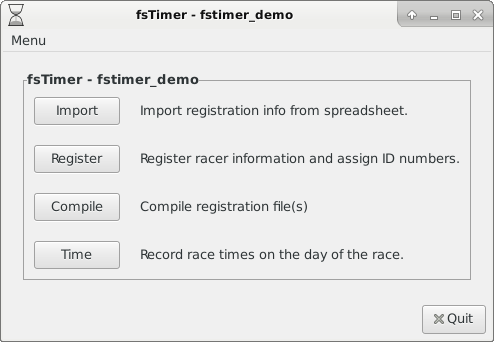
From the main fsTimer window, there are four main steps in timing a race: (optionally) importing pre-registration data from a spreadsheet, registration, compilation, and finally the actual timing. Each of these forms an individual component of fsTimer.
- Import - For many races you will have racers pre-register, e.g., online. This module allows you to import the pre-registration information from a spreadsheet into fsTimer. This way if you already have information stored in a spreadsheet you don't have to enter it all in manually.
- Register - This component is used to enter racer information into fsTimer's registration database.
- Compile - One of the features of fsTimer is the ability to do day-of registration on multiple computers. When registration information is entered into multiple computers, it can be compiled into a single registration file before timing, which is done here.
- Time - This is the component that is actually used to time the race. It has additional features like printing nicely formatted results, and exporting results to a spreadsheet.
You enter a module by simply clicking on the corresponding button from the main window. We will now give a description of each of these modules.
Continue on to Section 2.2 Importing preregistration.